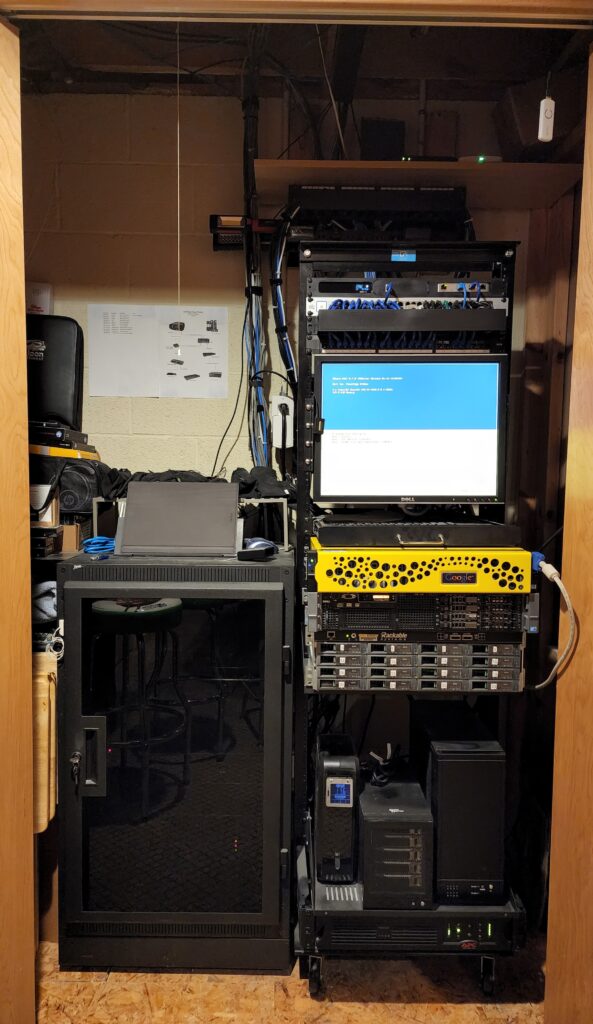
In October of 2023, my family moved. Not too far… about an hour away, but it’s still a new house that had extremely limited network infrastructure in place. Our previous house had 17 years worth of networking and connectivity. I was starting over. (We won’t even start talking about removing and reinstall ALL of my home automation devices.) So, let’s roll up our sleeves and talk about moving my mini datacenter as well as what I’ve learned from the experience.
Prep
Our new home was roughly an hour away. So, given the packing, transit, unpacking and installation, I knew that I either needed to have a mobile connection and power to stay online (I genuinely considered this just for the fun of the challenge) or move my critical websites to an alternative host temporarily. I chose Amazon Lightsail because most of my sites were either WordPress or standard PHP sites without much backend. Porting them over to Lightsail took an evening of work and I stayed within the limits for Amazon free tier. I switched dns over a week in advance to test everything. There were no issues and apart from the pain of creating new TLS certs, it was pretty painless.
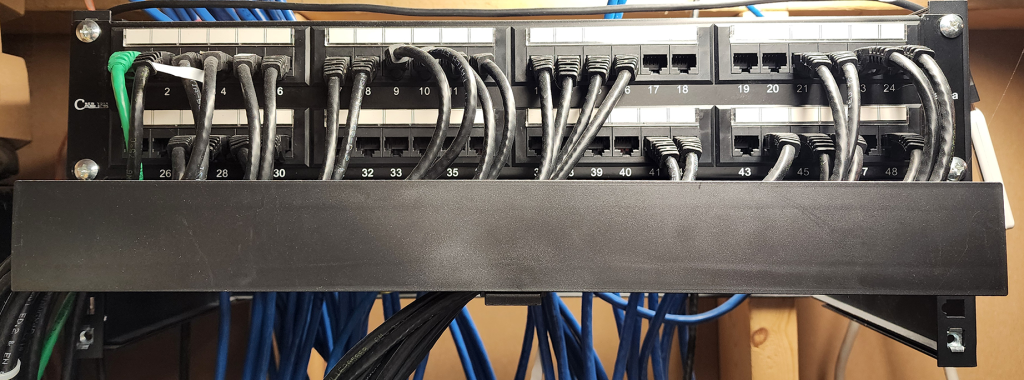
I wish that I could “plug and play” my hardware at the new house, but I only have one physical rack. I was leaving the patch panels for the network runs at the old house as well as a spare non-managed switch to make the new owner’s life a little easier. So, I built a network patch rack in the utility room and ran the minimum number of runs that I would need to operate: a pair of runs to the network ingress point in a corner of the basement as well as a few runs to my office and the first access point for the house. I also had to extend a 20A power run to the rack location. The electrical and network runs all tested well. I could move the hardware as soon as the internet was up.
Internet
Our previous provider was Comcast/Xfinity. Honestly, I was quite happy with the support and performance for which they are often criticized. However, we were limited to a lower transfer rate due to the infrastructure in our area. Comcast had no service in our new area and WOW! was the main wired provider. Surprisingly, WOW! offered some incredibly high speed options by comparison to our old service… and we were moving to farmland. I assume that an infrastructure subsidy for farmers helped support that and I am extremely grateful. (Technical note: we live on farmland that happens to also be near a major state university.)
The modem supplied by WOW! offered a bridged mode that eliminated the unnecessary management and wifi that my UniFi network already handles. It worked well enough, but about 9 months later, I upgraded to a UniFi UCI modem to prepare for the end of the free term for the WOW! modem rental. I also added a high-quality coaxial extension from the cable ingress point into the utility room. This made management easier and I didn’t need a second UPS for the modem, leveraging the main rack UPS instead.
Moving Hardware
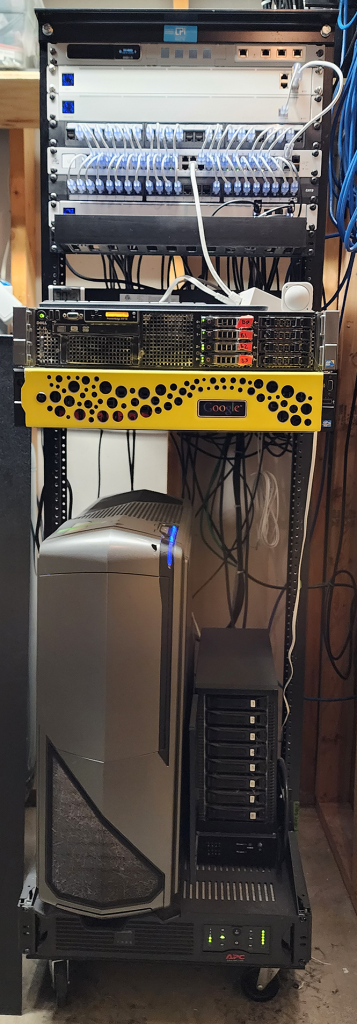
I decided to move my hardware personally instead of relying on the moving crew. (They did a fine job, but I’m glad that I moved most of my electronics and other valuables myself. Speed over care is fine for a sofa, but not my gear!) I decided to disassemble the equipment rack which contained my VMWare ESXi primary and failover servers, storage array, 48 port PoE switch, gateway, UniFi controller and UPS. I removed and packaged all of the spinning drives from my servers and array in shielded and padded shipping boxes after reading horror stories on /r/homelab… but more on that later.
The hardware and disks were carefully packed and loaded into the backseat/interior cargo area of our pickup truck and the rack was loaded into the truck bed along with other items I wanted to move personally (to provide some stability). We carefully unloaded everything into a staging area in the basement, set up the rack, installed the basic networking hardware and primary ESXi host and started up the web hosting VMs.
There was a long list of to-dos to make everything work before switching over:
- Configure the network and network security for the new house
- Pre-configure DNS to point to our new IP
- Update the dynamic dns scripts with new renewal tokens
- Update the ESXi config to only start the most necessary VMs
- Internal DNS cleanup (bind6/named)
After a day of set up, I tested everything that evening before heading back to our old house to continue preparing to move the non-computer stuff!
Switching Over
I performed some basic testing with an internal hosts file to ensure that everything was responding correctly. I then backed up the databases from Lightsail, compared them to the DBs on-prem and updated the 2 that had new comments or other significant changes in the roughly 2 week transition operation. Lastly, I updated DNS and watched our minimal traffic start to connect to the new location.
The switch over was the least complicated and stressful part of the process… which is how every major project should feel at launch. All the work is in the prep and automation.
Payoff On That Foreshadowing…
Remember how I mentioned the horror stories that I was trying to avoid by packing my spinning drives into padded and shielded boxes? Well, that all worked well… for about 3 months. In mid-December, I woke up and heard the angry piezo scream of my RAID controller in the primary ESXi host. One of the disks in my media storage array had failed. Occasionally, I would have to rebuild the array when I lost power suddenly or some other ridiculousness. This was a truly failed disk. Not a big deal, right… I had three RAID 10 arrays with between six and eight disks in each array definition. So, I could loose 3 or 4 disks per array without loosing the data.
The traumatized array had 6 disks and I had 2 extra drives. So, I swapped the bad disk with one of the extras. Note: these weren’t configured as spares. I just swapped in a new physical disk and let it rebuild. I was so confident, that I continued to use the data while in recovery since it was going to take a few days. However, a few hours later, I heard another screaming alarm while I was working in the next room: another disk had failed. I swapped it with my last remaining extra disk and took the array out of service… this time I wanted to be careful. The recovery was going to take twice as long now.
Two days later, more RAID controller screaming and I lost a third drive in that array before the replacements arrived from CDW. It really didn’t matter if I had no replacements because the recovery had not completed. That array was dead and all of my media with it. (I also had one bad drive appear on another RAID 10 array, but I took it out of service and swapped it when the replacement drives intended for the first array arrived.) So, I’m done for, right? Nope: I used Backblaze to back up all of that data. I had everything in cold storage (kind of) that I could recover.
Homelab V2
Around the same time as my data loss drama, Broadcom (who had aquired VMWare) nuked their licensing for enthusiasts. On December 11, 2023, they announced the end of support for perpetual licensing and changed the pricing model where it would be nearly impossible to pay for future versions of ESXi for a homelab. This was a sign: build a new server.
I won’t go into too much detail in this already-too-long post, but I built a new ProxMox PVE server using an ASRock Rack MoBo, a ton of memory and switched from RAID to JBOD and ZFS. The move away from RAID wasn’t just because I was salty over the disk failure. Honestly, that’s just my fault. I could have moved the disks in a passenger car with more compliant suspension and that MIGHT have saved my disks. But I really should have had spares configured in the RAID array. If they survived the move, they would have allowed me to swap to the spares and then replace the disks without having to recover data. I was just being cheap and ran out of space in the storage chassis.
Though my data was backed up, it would take forever to transfer it back via the internet to my new ZFS stores. I decided to leverage Backblaze’s physical restoration option. I paid a refundable fee plus shipping to have my data copied to physical disk drives that were shipped to my house where I manually transferred the data over USB3 to the new storage. That went very smoothly. In my new homelab, I’ve switched my ESXi failover host to a ProxMox Backup server and modified an 8-bay RAID enclosure to support 8 eSATA connections directly to each disk. Combined with a pair of SAS 1x HD SFF-8644 host to 4x eSATA fanout cables, I now run a weekly backup schedule for my data and keep it all on prem as well. In keeping with the more modern “3-2-1-1-0” vs. “2 is 1 and 1 is none” philosophy, I’m happier with this and feel safe knowing my data is more accessible.
TL;DR
I moved. My homelab had to move with me. I moved my publicly available websites to Amazon Lightsail as a temporary host. Moved the hardware. Switched over to my new network. Lost a bunch of data, recovered the data from backup onto a new server. My homelab is better than every and I admit that although stressful, I enjoy the challenges of running and maintaining my own servers an more-complicated-than-neccessary home network. Now… what about that home automation…
- Duane
 Pictures
